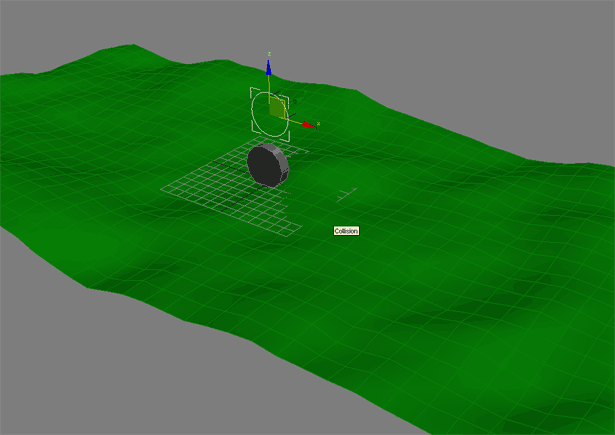
First, lets load the max file with the objects we will need. You can download the file here.
We see that we have a simple ground plane with a circle shape and a cylinder object under it.

|
| Back to Maxscript Home |
|
Tutorial 04 - Script Controller Collision Detection In this tutorial, we extend the ray casting tutorial with a scripted controller so that we have real time collision detection in 3DS Max. |
||
|
First, lets load the max file with the objects we will need. You can download the file here. We see that we have a simple ground plane with a circle shape and a cylinder object under it.
|
||
|
Objects in 3DS Max can have several different controller types. The standard controller type for position is a PositionXYZ controller. You can verify this by opening the curve editor. Click on the cylinder (Wheel1) and go to the graph editor menu item and select curve editor.
|
||
|
We are going to change the controller type to a position script, as you can see in the animation below. Right click on the Position transform of Wheel1. Click on Assign Controller and pick Position Script.
|
||
|
When you complete the steps above, a new script window will appear. All the scripting commands that you would use in a script are now available in this controller. The important thing to remember is that the last line of the script needs to output the proper value. We'll talk more about this in a moment. This is the script we are going to use for this tutorial.
|
||
|
Let's take a look at what this script does. dependsOn $Collision $WheelGuide1 ) The command dependsOn updates the code when the nodes listed after it change. So, in this case, we want to update the script when either the collision mesh is altered, or if we move WheelGuide1. Without this line of code, the wheel position would not update in real time. |
||
|
Now lets see the heart of the script. dependsOn $Collision $WheelGuide1 ( rayToTerrain = ray $WheelGuide1.pos [0,0,-1] Zposition = intersectRay $Collision rayToTerrain ) These commands should look familiar if you completed the previous tutorial. The ray command creates a vector that is "shot" from the position of wheelguide1 in the direction of negative Z. So the format for this command is: ray start_position [direction] We then use the intersectRay command to find the location that the ray hits the terrain. IntersectRay can also return the nomal information of the intersection, so if we wanted to align something to the face the ray hits, we can easily do that, as well. The format for this command is: intersectRay object_ray_will_collide_with ray We assign variables to these values for ease of use, and to make the code more readable. |
||
|
Now that we know at what point the ground is below the wheelguide, we will assign that position to the wheel. Since we have a script controller in the Position transform, we need to end with an x,y,z transfrom so that the wheel knows where to go. The rule of thumb is that the controller can have any scripting you want in the body of the code, but you must end with a value that make sense for the controller you are replacing. dependsOn $Collision $WheelGuide1 ( rayToTerrain = ray $WheelGuide1.pos [0,0,-1] Zposition = intersectRay $Collision rayToTerrain ) [$WheelGuide1.pos.x,$WheelGuide1.pos.y,(Zposition.pos.z + $WheelGuide1.radius)] So, we provide an x, y, and z position for our wheel. Since we want our wheel guide to drive the x and y position of our wheel, we simply set the x and y values to equal that of the wheelguide. We set the variable Zposition to be the point where the ray hits the ground. So, we'll set it to be the z value. But, since we don't want the wheel to be centered in the ground, we add the radius of the wheelguide1 so that it sits on the surface of the ground. |
||
|
Now we get to the fun part. If you did all the steps above correctly, you should be able to slide the wheel around the terrain and it will follow the bumps in the terrain just fine. Beware if you go outside the terrain, the script will crash. I did not put any checks to see that the ray is actually hitting somthing. You can change the radius value of the Wheelguide1 and the wheel should be either raised or lowered into the terrain. |
||
| Files: | ||
|
|
||
 tut_04_wheel1.max tut_04_wheel1.maxThe completed sample file.
|
||
 tut_04_wheel2.max tut_04_wheel2.maxThis file has four wheels linked up. |
||